SW+ Project Build - Stage 7 The PA circuit
Build instructions by Paul M0BMN
< Previous Next >Stage 7 The PA circuit
here are the few parts we need for this
Resistors
Just R29 51ohm Green-Brown-Black
Capacitors
| C12 | 220uF | Ele Cap 220uF 25V |
| C35 | 0.01uF | Ceramic Disk Marked '103M' or 103 |
| C36 | 0.1uF | Small Yellow Pillow Type Marked '104' |
| C37 | 1000pf | Small Yellow Pillow Type Marked '102J' or '102' |
| C38 | 0.0022uF | Small Yellow Pillow Type Marked '222J' or '222' |
| C39 | 1000pf | Small Yellow Pillow Type Marked '102J' or '102' |
| C40 | 100pf | Small Yellow Pillow Type Marked '101J' or '101' |
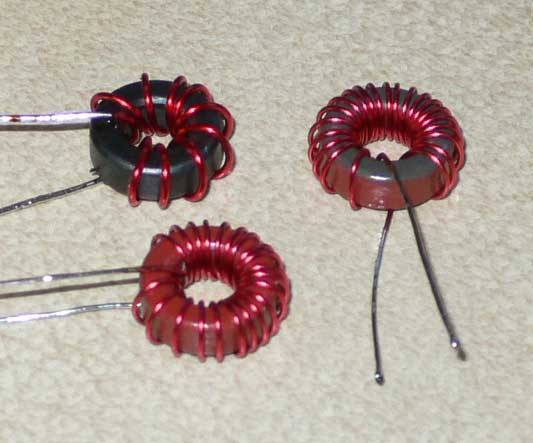
Now more coils to wind
Don't you just love um!
L2, L3 & L4 winding details are on page 14
I'm sure you can do it now, just follow the instructions , when done they should look like the ones below

Well that's the last inductors you need to wind for this kit
Don't forget to fit RFC3 too, its 22uH Red-Red-Black-Gold
Now The semiconductors
D12 33V Zenner on that yellow card
D6-D10 IN4148
Q6 PA Transistor Marked C2166
Right on with the build fit the resistor first
Then The capacitors
next the diodes, don't mix them up and make sure you fit them the right way round!
Now Fit RFC3
Now fit the Inductors we that we enjoyed winding so much, following the instructions in the manual.
finally fit the PA transistor
Now look at my picture below to make sure you fit it the right way round

We if you have made it this far your doing really well, we just have the alignment to do before the radio can be declared built!
Go to stage 8 for the final installment
< Previous Next > Back to SW+ Project Build page
